Flexible Seating in a 21st-Century Classroom
A few years ago I began noticing the term flexible seating popping up all over. My teacher friends were talking about it and articles about it were appearing on blogs and social media accounts I follow. I was incredibly intrigued by this concept and found myself researching it to learn more. While I immediately recognized it was something that I wanted in my classroom, I had a million questions and apprehensions floating around my head and it took me about two years before I was ready to take the leap and give it a go.
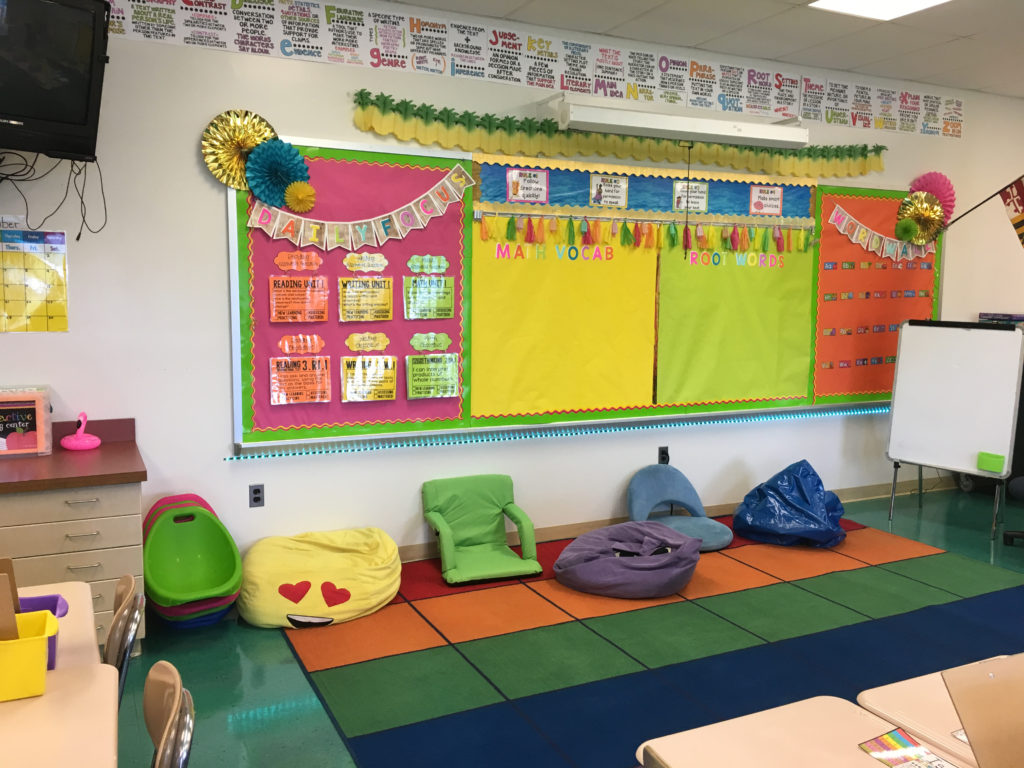
Some of our flexible seating options!
WHAT IS FLEXIBLE SEATING?
A loose definition of flexible seating is giving students the choice to sit where they want in the classroom. However, it is a bit more complex than that, as it looks different in every classroom, for every group of students, and for each educator’s teaching style.
The philosophy is that giving students the choice to sit somewhere that is comfortable and a good fit for their learning style will foster increased responsibility, accountability, self-awareness, and stamina.
Whenever I am sitting in a meeting for over an hour, I am reminded of why I use flexible seating in my classroom. As time goes by and I get restless sitting at a desk or table, my brain becomes consumed with thoughts about how long it will be until I can get up and move. If I feel this way as an adult, I know it is even more likely that my third grade students feel this way sitting at a desk in the classroom for hours on end. Every teacher implements flexible seating for different reasons, but the main reason I do it is because I never want my students to have that feeling in my classroom.
WHAT OPTIONS SHOULD I GIVE MY STUDENTS?
When I first committed to using flexible seating in my classroom I had thirty students, which translates to thirty desks and chairs. While I have seen flexible seating classrooms with no traditional desks or chairs, I knew that I did not want to get rid of them that year. It was my first year making a huge shift in my classroom environment and I knew that I needed the desks there as a safety net and to provide the students with some structure, especially in the first few weeks of school. I arranged the desks into three large groups to provide ample open space around the room. During the summer, I prepared by buying and creating flexible seating choices. I also used a website called DonorsChoose.org to request donations for some of the items I wanted that were not in my budget. The most important item I purchased was a class set of clipboards, which I got at the dollar store. While I did not start off with many “fun” seating choices, my students still loved having the choice to grab a clipboard and choose a spot on the rug or around the room to work in a comfortable position. After two years I now have:
- Three bean bag chairs
- A tub of small pillows
- A tub of inflatable balance discs
- Twelve plastic scoop rockers
- Six wobble stools
- Six regular stools
- Five crate seats
- Three rolling chairs
- Two beach chairs
- A few area rugs placed around the room
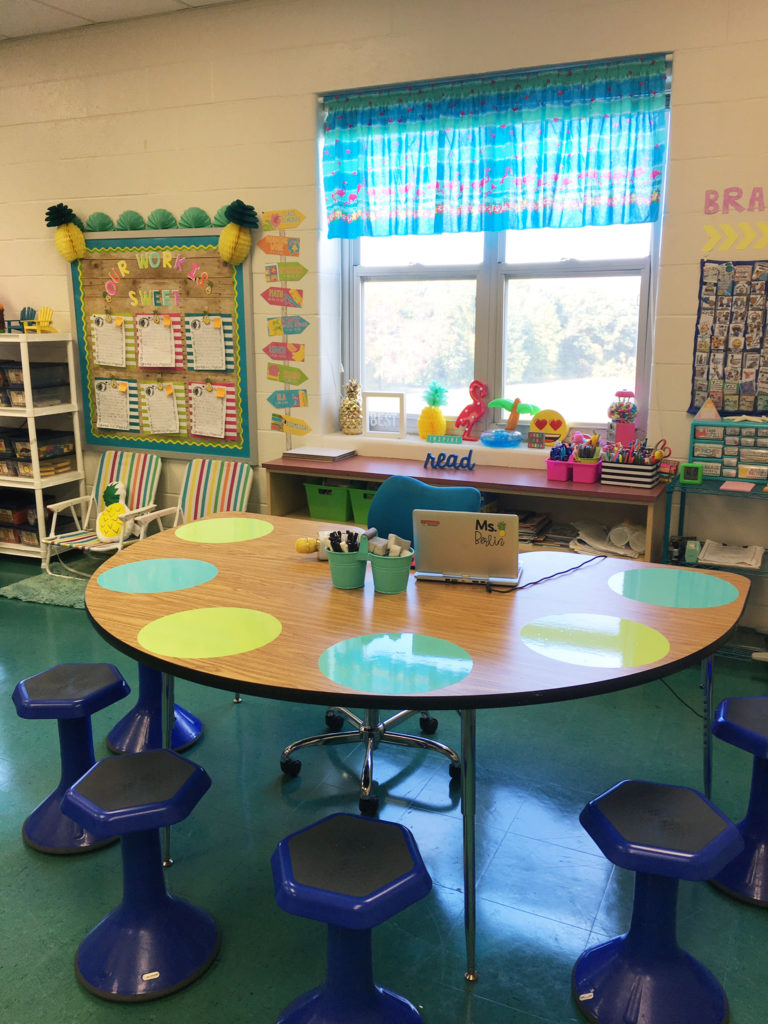
Wobble stools around a table
In the second year, I also switched over to tables from desks, which has created a lot more room. The one flexible seating item I have tried that just did not work in my classroom were yoga balls. They rolled all over the place, the bouncing movement distracted other students, they required a lot of upkeep with the constant need for pumping, and all four ended up popping by the end of the year. However, the rest of the choices have been wonderful and have held up much better than I expected. They were absolutely worth the investment.
HOW DO I IMPLEMENT FLEXIBLE SEATING?
If you want to succeed with flexible seating, the most important part is making sure you are purposeful and consistent in setting up the procedures and expectations in the beginning of the year. All of my students begin the year with an assigned seat. We do not use the flexible seating choices for the first few days of school while we practice basic rules and procedures. They are very curious about the choices they see around the room and I explain to them it is something I am excited to share with them when I see they are following the rules and showing responsibility. When I introduce flexible seating for the first time, I make it clear that I am giving them a big responsibility, since there are going to be times throughout the day when they can choose where they sit around the room. I have an anchor chart that I show with the rules and expectations, which are:
- Choose a working spot that helps you do your best.
- Use each seat appropriately.
- If a spot is not working for you, move so you can be successful.
- Clean up after yourself and others.
I have a discussion with the students and have them share what rules they think are important and why. I show examples of appropriate and inappropriate behavior in flexible seating. We also discuss why it may not be a good choice to sit by your friends if they are going to be a distraction. I tell them that the amount of time they get to use flexible seating during the day depends on them being responsible and following the flexible seating and classroom rules. It is important that during the first week or two the students get a chance to try the different choices so they can figure out what works best for them.
In my experience, after the trial run, they all end up developing a personal preference for particular seats and spots. The first year I called them by table to choose their seat and the second year I used a rotating clip chart. I display a one-minute timer on the projector and we practice transitioning by the time it runs out. In the beginning, this takes a few tries. I have them practice until they get it right so we get in the habit of finding a seat quickly and getting right to work. I also model examples to help them deal with conflicts that may arise while they choose their seats. For example, if two people both want the same seat they can play rock-paper-scissors or make a compromise (you use it for the first rotation and I’ll use it for the second rotation). I give the students clear expectations for what they should be working on and let them know they have to remain on task to stay in flexible seating. I explain that if one or two students are off task, I will have them move back to their assigned seat, but if more than that become off task, we will all go back to our assigned seats.
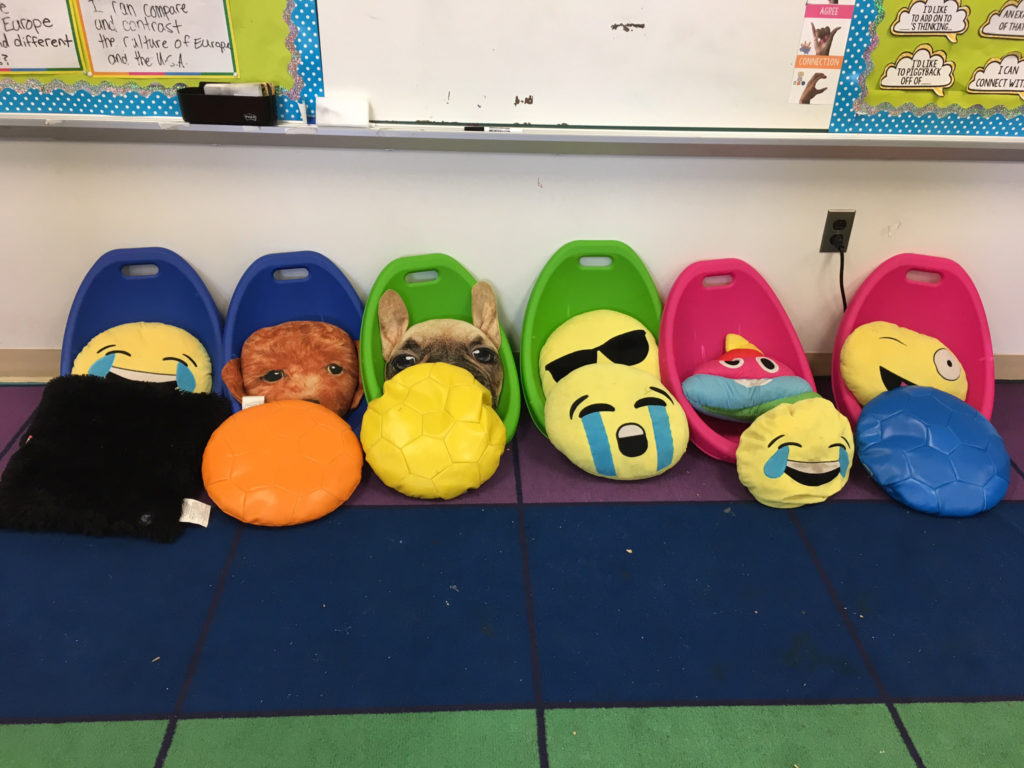
Rockers, pillows, and inflatable balance disks
WHAT DO I DO IF MY STUDENTS AREN’T LISTENING?
It takes time to build stamina and in the beginning they may only show on task behaviors for 5-10 minutes. A lot of this is due to the novelty and excitement of the different seating options and needing to learn from experience not to sit with friends who will distract them. As soon as I see more than a couple students going off task, I ring a bell and tell them we are going to transition back to our assigned seats (which I call our home base). I again display the timer and explain that it has to happen quickly and quietly. I have learned that it is incredibly important not to allow students to stay in flexible seating if they are not following the rules. The kids absolutely love flexible seating and after a few times of losing it because they are not following the expectations, they are willing to sacrifice their off task behavior to get to sit in a seat of their choice. At the end of the day, I have a discussion to reflect three things we did well and three things we could improve. I also give positive feedback to the students that I noticed doing a great job and give them a reward in front of the class (I use brag tags). The past two years I have noticed that it takes about a solid month of this very structured practice before I start to see real self-sufficiency. There will be good days and not-so-good days, but if you stick with it and remain consistent, it is totally worth it.
I usually teach a group lesson for 10-20 minutes and then release the students to flexible seating for 1-2 hours while we have our reading or math rotations. I use this time to meet with students for small group. It is crucial that your students know what they should be doing during that time and what they should do if they are confused. I project a rotation board with clear instructions and I always have early finisher choices for them. I make it clear that being off task is not a choice.
Flexible seating has made such a huge difference in my classroom environment and for my students. There are both pros and cons, but for me the pros far outweigh the cons.
Once the expectations are set, my students are able to stay on task and produce high quality work for a significantly longer period of time than sitting at a desk.
This allows me to focus much more time on small group instruction and much less time on behavior management. I have also seen a huge shift in my students’ attitudes towards school and their willingness to persevere. My students genuinely enjoy coming to school and I believe a major reason for this is because flexible seating allows them to feel valued and comfortable. They function better as a community and enjoy taking responsibility in the success of our classroom. My best advice to a teacher who wants to start flexible seating for the first time is to start small, be consistent, and stick with it!
Thank you! This was VERY helpful. I am just beginning to explore the options. (ha! ha! Last year all I did was provide the option of standing instead of sitting while using the new i pads . So obviously, I need the help) Your step by step guide to how YOU made it work for you give me confidence to start small and expand the use of flexible seating. Have a great school year–you have inspired me!
Loving the information on this website , you have done great job on the posts.